Requirement
- CentOS 8
- VMware
- Configuration file
Let’s Start…
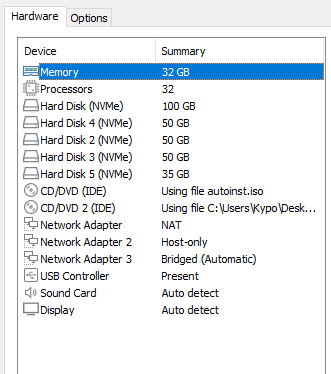
First of all, you need to configure your VMware according to the following screenshot.

I set RAM to 32 GB but you set it to 8 GB minimum, depending upon your RAM size, and Processor set to 32.
Add 5 hard drives, 100 GB for CentOS, which is already available starting from 20 GB. Additionally, we need 4 local hard drives for installing various VMs on Open Stack. The sizes of these local hard drives range from 30 GB to 50 GB.
Add 3 network adapters to the CentOS VM configuration in VMware settings. One adapter is already available, and you need to add 2 more.
Your cent OS Network Adapter should be at NAT settings
- The second network adapter will be a
HOST-onlysetting. - The third network adapter will be a
bridgedconnection.
Make sure to match the configuration with the first screenshot at the top of this article. Name your VM and set the username and password for your CentOS login screen. Leave the other settings as they are. Close the settings and then turn on your VM. The installation process of CentOS is fully automated.
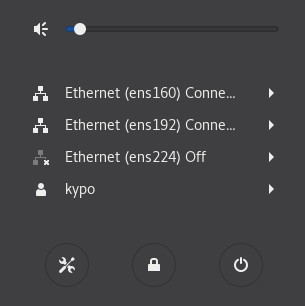
Please ensure that your internet is working properly and that all adapters are functioning correctly. You can check them from the VMware Status bar or the Network panel of CentOS. Currently, ens224 is turned off.

CentOS
On your terminal, and get root access. Now use this Command for OpenStack local hostname.
su
hostnamectl set-hostname openstackio --static
openstackio is the name. You can use any name of your choice. This execution of the command will set the local hostname only.

To configure your IP with your local host. I use an ens160 IP address. Use the command to map your IP to the local host. The name for the local host should be the same as set in the previous command. Then use the cat command with directories to verify your mapping:
echo "192.168.186.131 openstackio" >> /etc/hosts
cat /etc/hosts
Now use these Commands:
setenforce 0
sed -i 's/^SELINUX=.*/SELINUX=disabled/g' /etc/selinux/config
Now use following command the following command to install network
scripts dnf install network-scripts -y
Upon completing this, the following output will be displayed.

Now use the following back-to-back commands.
systemctl disable --now firewalld NetworkManager
systemctl enable --now network
dnf -y install lvm2

Upon completing this, the following output will be displayed.

Now use the following command to check the size and space of the hard drive you added in your VM configuration.
fdisk -l
Now use these commands for more configuration making tables and groups in free space.
pvcreate -f /dev/nvme0n2
pvs
vgcreate -f cinder-volumes /dev/nvme0n2
vgs
mkfs.ext4 /dev/nvme0n3
mkfs.ext4 /dev/nvme0n4

Now use this Command:
yum install dnf-plugins-core
Upon completing this, the following output will be displayed.

Then use the following command to enable some power tools etc.
yum config-manager --set-enabled powertools
dnf install -y centos-release-openstack-train

After this, we will utilize the following command to install the necessary and additional packages, which will take some time.
dnf update –y
Upon completing this, the following output will be displayed.

Now it’s time to install OpenStack. Use the following command to install OpenStack. It will also take some time to download and install packages. Also you need some changes in the configuration file in yum.repos.d
dnf install -y openstack-packstack
Upon completing this, the following output will be displayed.

Now use these commands to allow access to file of Configuration.
packstack --gen-answer-file=answer.txt
Now, use nano to edit the configuration file answer.txt. Search and make changes to the following lines. Use ctrl+w to search and arrows to move the cursor.
- CONFIG_DEFAULT_PASSWORD=admin123
- CONFIG_HEAT_INSTALL=y
- CONFIG_MAGNUM_INSTALL=y
- CONFIG_SSL_CERT_DIR=~/packstackca/
- CONFIG_SSL_CACERT_SELFSIGN=y
- CONFIG_SSL_CERT_SUBJECT_C=ID
- CONFIG_SSL_CERT_SUBJECT_ST=Punjab
- CONFIG_SSL_CERT_SUBJECT_L=Islamabad
- CONFIG_KEYSTONE_ADMIN_PW=admin123
- CONFIG_CINDER_VOLUMES_CREATE=n
- CONFIG_NEUTRON_OVN_BRIDGE_MAPPINGS=extnet:br-ex
- CONFIG_NEUTRON_OVN_BRIDGE_IFACES=br-ex:ens160
- CONFIG_NEUTRON_OVN_BRIDGES_COMPUTE=br-ex
- CONFIG_NOVA_LIBVIRT_VIRT_TYPE=qemu
- CONFIG_HORIZON_SSL=y
- CONFIG_SWIFT_STORAGES=/dev/nvme0n3,/dev/nvme0n4
- CONFIG_SWIFT_STORAGE_REPLICAS=2
- CONFIG_SWIFT_STORAGE_FSTYPE=ext4
- CONFIG_PROVISION_DEMO=n
admin123 is a sample password. You can use a password of your choice. Press Ctrl+X to save and quit the file, then press Y to ensure that the file is written successfully and saved. After that, use this command. It will take a bit longer to complete the configuration we have just done.
packstack --answer-file=answer.txt
Upon completing this, the following output will be displayed.

Run the final command.
dnf install -y wget
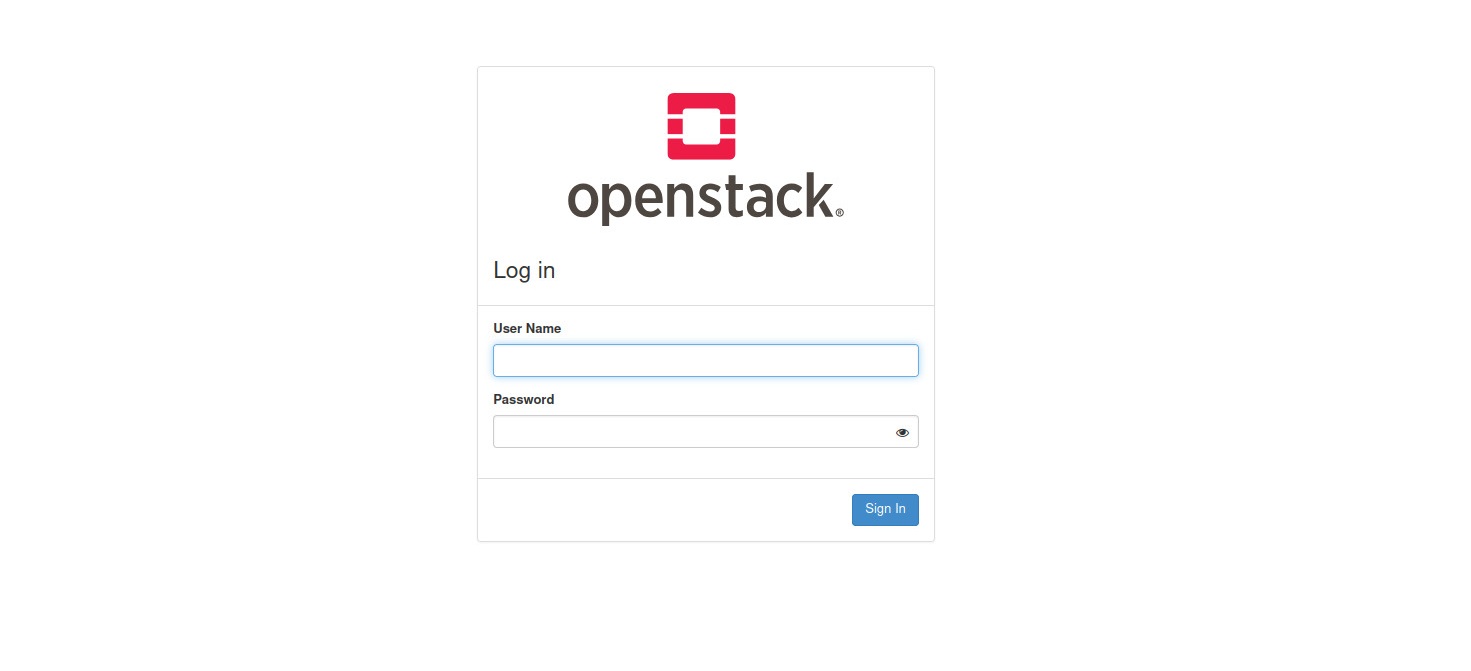
You can access your OpenStack on your browser using:
https://192.168.186.131/dashboard
Note:
Please make sure to use your own IP to access your OpenStack Dashboard. When prompted for login credentials at the OpenStack login screen, use the following:
- Username: admin
- Password: admin123 (use your own password as per your setup)